Silicone sealant is a helpful material for your DIY projects at home. If you want to repair bathtubs, faucets, or sinks, you can use silicone sealant. However, you must know how to apply a silicone sealant before
Hence you need to find the right one for your projects.
The following article is especially for you to learn all about silicone sealant before you take up the project!
What is Silicone Sealant?
Silicone sealant is a flexible, waterproof material used to seal joints, gaps, and cracks in various surfaces. It is commonly used in construction, plumbing, and DIY projects for sealing windows, bathtubs, sinks, tiles, and more.
For its durability, silicone sealant remains flexible over time, making it ideal for areas exposed to moisture, temperature changes, or movement.
How to Apply Silicone Sealant Properly
Here are tips on how to apply silicone sealant:
1. Choose The Right Silicone Sealant:
The type of silicone you choose determines the time will take to harden and how elastic it is. A universal sealant remains the right choice for broad use.
If you need to use the silicone sealant in the washroom and moist places, select multi-resistant adhesive as it helps the joints not to blacken as time passes. You should also note that you can paint some sealants while others cannot.
You also need to note, that not all types of silicone are ideal for every job.
For example, an acrylic sealant is unsuitable for tile, glass, or smooth surfaces. Teflon sealants are suitable for use in roofing areas. You improve silicone sealant adhesion by applying a primer coating.
2. Prepare the Surface You Want to Seal:
Before applying silicone sealant, ensure the surface is clean free from dirt and particles, or dust. The presence of any dirt on the surface you wish to seal will weaken your seal.
To prepare your surface, soak a cloth in soapy water and wipe the surface. Rinse the cloth and wipe the surface again. Dry the surface with a sponge. Ensure you dry all the water as moisture can cause more issues.
3. Masking:
If you want to achieve the best result when applying silicone sealant but are unsure if you can use the sealant correctly on a straight line in hard-to-reach areas, masking tape can be of great help.
Apply the masking tape on both sides of the surface you wish to seal. Then remove the tape before the silicone tape dries. They can be of invaluable help in ensuring you apply your silicone sealant correctly.
4. Making the Seal:
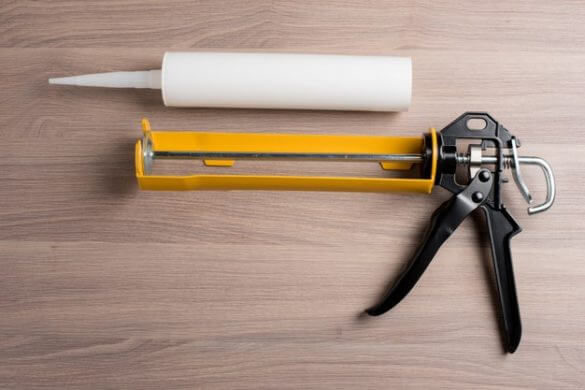
Hold the sealing gun at an angle of 45 degrees, and pull the gun towards your side. Ensure you find the right working speed to help you apply the sealant correctly.
When you move too slowly, you will get a bumpy and uneven sealant surface, wasting the sealant pointlessly. If you move too quickly, you will not fill the gap nicely.
When you reach the seam’s end, release the gun handle and press the button at the back to apply pressure to stop the sealant flow instantly. Failure to do this, the sealant not to stop flowing from the nozzle.
Finishing Off the Sealant Line:
Smooth out the seam using your wet finger from soapy water. Soap helps silicone sealant not to stick to your finger. Use soapy water to get rid of any silicone sealant remains.
After drying, you can remove the silicone sealant with a hard sponge or a knife. Also, you can use special equipment to apply and remove silicone sealant.
How to Clean Up After You Apply Silicone Sealant
Cleaning silicone sealant requires quick action and the right tools to ensure a neat finish and prevent mess. Here’s a step-by-step guide:
1. Clean While Wet
If the sealant is still wet, it is much easier to clean:
Tools: Use a damp cloth or paper towel.
Steps: Wipe away excess sealant gently. Avoid smearing it, as it can stick to surfaces.
Tip: Use rubbing alcohol or mineral spirits on a cloth for stubborn areas, but only on non-porous surfaces like glass or tiles.
2. Remove Once Cured
If the sealant has already dried, follow these steps:
Cut Excess Sealant: Use a sharp utility knife or a razor blade to carefully scrape away excess cured silicone. Be cautious not to damage the surface.
Use Silicone Remover: Apply a specialized silicone or acetone to soften the residue. Let it sit for the recommended time before scraping.
Scrape Gently: Use a plastic scraper or an old credit card to avoid scratching surfaces.
Wash the Area: Clean the surface with soapy water to remove leftover residue.
3. Clean Tools
If silicone was applied with a caulking gun, wipe it with a damp cloth immediately after use.
For tools, soak them in rubbing alcohol or mineral spirits to dissolve any silicone residue.
Tips for Easy Cleanup
Always wear gloves to avoid silicone sticking to your hands.
Use masking tape around the area you’re sealing for a cleaner application and to prevent spreading.
Work in small sections to minimize cleanup time.
You can ensure a clean, professional finish every time by acting quickly and using the right methods.
Bottom Line:
When you apply silicone sealant, it is useful in filing seams and gaps in bathtubs, sinks, and their surfaces. It is essential to look for the right silicone sealant type suitable for your project.
Use mould-resistant silicone sealant in bathrooms and other moist areas.
Read Also:


